|
Creating
a new query is very easy - simply click the button
- Choose
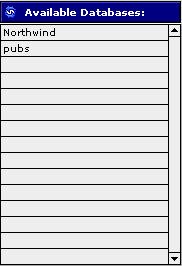
a table from the list of databases:
If
you do not see any databases listed, click the  icon ("Refresh") to refresh the list. NOTE:
You can refresh the list of databases at any time by clicking
the refresh button ()
icon ("Refresh") to refresh the list. NOTE:
You can refresh the list of databases at any time by clicking
the refresh button ()
-
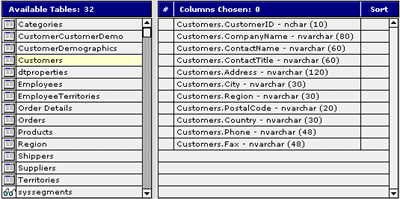
Once
you choose the database, you'll see a listing of all the tables
within the database you've chosen:
 . .
Depending
on the preferences you've chosen, you will see both tables (indicated
by the icon) and views (indicated by the icon).
-
When
you click on a table (or view), you will see the columns in
that table (or view):
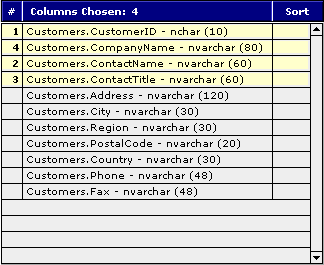
You
can choose up to 25 columns (total, included related
columns) to be included in your query. Remember, in SQL
the order in which you choose the columns is the order in which
the data will appear in your report. The column order in
the query will appear to the left of the name in the column
marked "#".
-
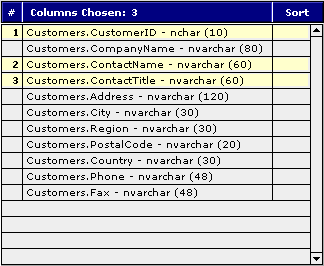
To
remove a column from your query, simple re-select the column
name.
-
You
can sort your report by ANY column - you DO NOT
have to include the column in your query in order to sort your
report by that column. Like the columns order, the order
in which you choose the sort column will determine how your
report data will be sorted. When you select a column for
sorting, you will see an icon next to the column, as well as
its sort order:

-
To
remove a sort column from your query, simple re-select the column
name. The sort order will change automatically:

As
you add (or remove) columns from your query or add (or remove)
sort columns, the SQL statement below the list of databases,
tables and columns will update automatically based on your selections.
- You
can optionally choose to perform a search when each query is run.
You specify the search criteria by choosing the field to search
on, the operator (i.e. equals, greater than, less than, etc.)
and then the value to search by.
This will help improve the performance of ClickQuery, since not
every row in the SQL database will need to be downloaded and formatted.
To enable a filter (or "search") - simply click the
checkbox next to "Use Find Criteria" (above the SQL
statement).

Once
you click the checkbox, other options will appear:

The first pop-up menu contains a list of all the fields selected
in the current query. The second pop-up allows you to specify
an operator (=, <>, <, =<, >, >=, Begins With,
Ends With, Contains) and then the choice of a static value (one
you enter and cannot be changed when then query is run, or the
"<USER DEFINED>" value - that will allow the user
of the query to enter a value.
We have also provided the option of displaying a pop-up menu of
all the existing values for the search field - so that when the
query is run, you'll be assured of finding at least ONE matching
record. To enable this feature, choose "<USER DEFINED>"
in the third pop-up menu and check the checkbox next to "Popup
of existing values."

When you run a query that has a filter (a "find") -
the criteria used to generate the report will show at the top
of the report:

Once
you've selected all of your columns, (optionally) indicated the
sort order, (optionally) indicated the find criteria, named the
query and chosen whether or not to protect the query, you can then
click the button to save your query and execute the report.
|